Using the Listings Tool
The Listings tool puts active storage deals, and the people working them, in the same place buyers already spend their day. Brokers can list a site (or a full portfolio) directly inside TractIQ, and buyers can filter for on-market and listed facilities right alongside the data they already use to underwrite.
For Brokers: Putting Your Listing in Front of Active Buyers
Serious investors are in TractIQ every day for their data, prospecting, and storage needs. Listing your site here places it directly in front of that audience, and it shows up in three spots: the prospecting tool, the map, and the Listings page.
For brokers who want access to our Listings tool; please reach out to us to grant you access.
Here is how to add one once you have access.
Create The Listing
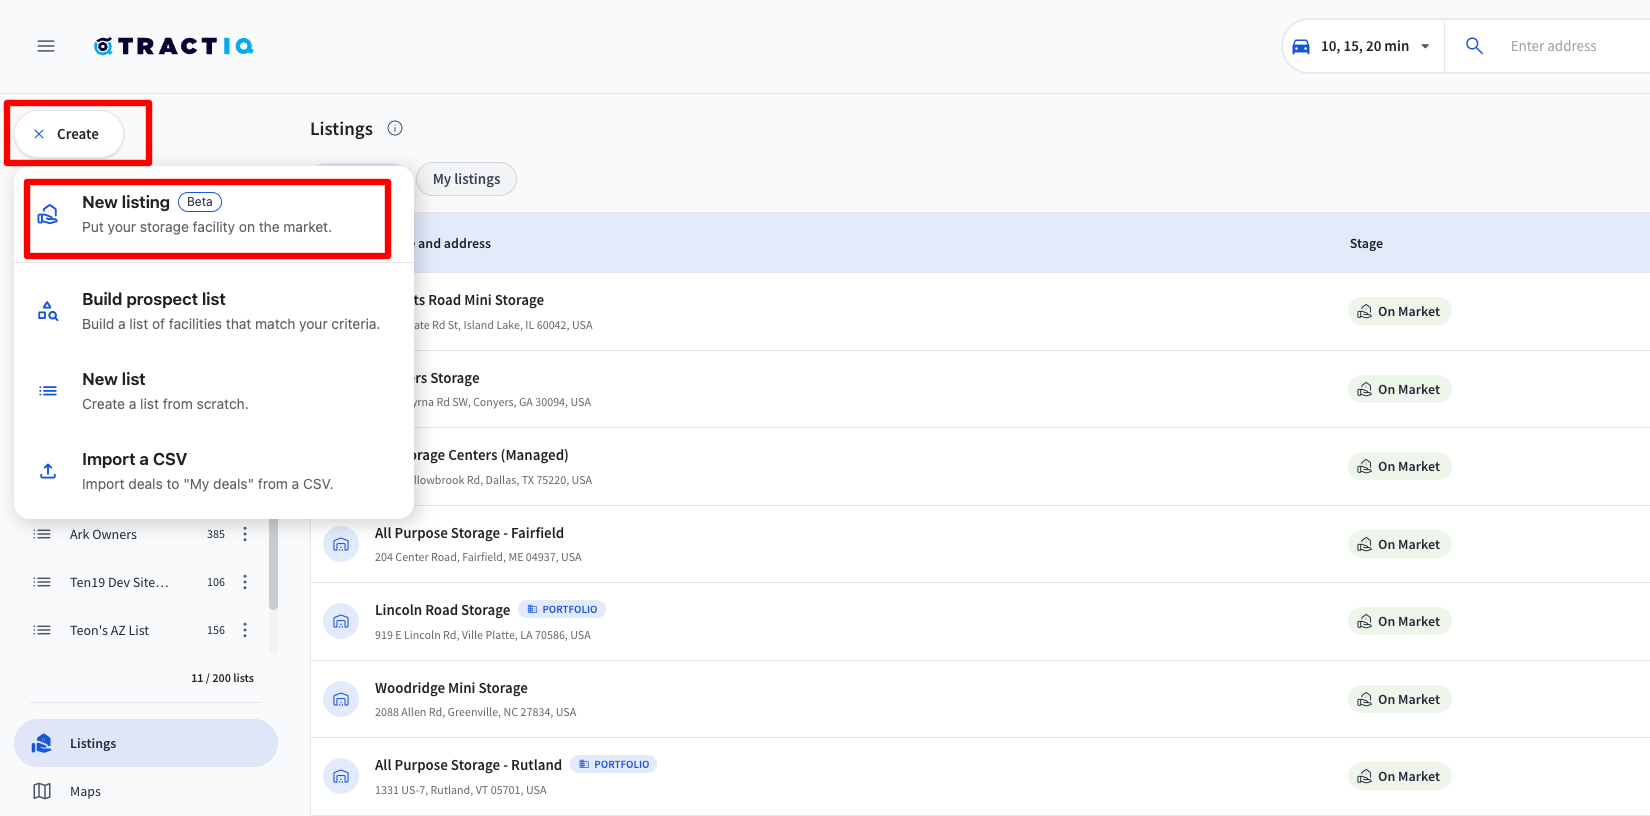
- From your dashboard, click Create, then Add New Listing at the top.
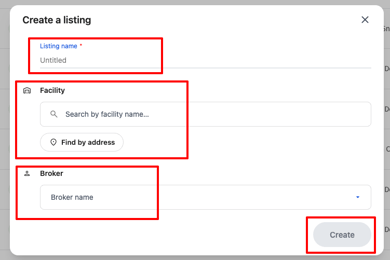
- Give the listing a name. This is the name of the storage facility.
- Add the site by address or facility name. You do not have to be exact. If you type in an approximate address, TractIQ pulls the nearest 10 facilities so you can pick the right one. If you have the exact address, it will pull that facility straight from TractIQ's database.
- Add the broker or brokers working the listing. One heads up here: anyone you add has to have a TractIQ account within your organization for you to attach them to the listing. Once you create the listing, you’ll have a box to enter in Broker of Record details, and licensure information.
- Click Create. This opens the edit page where you can fill in the rest of the details. Don’t worry, listings won’t go live until you explicitly publish them after filling in details.
Fill in The Details
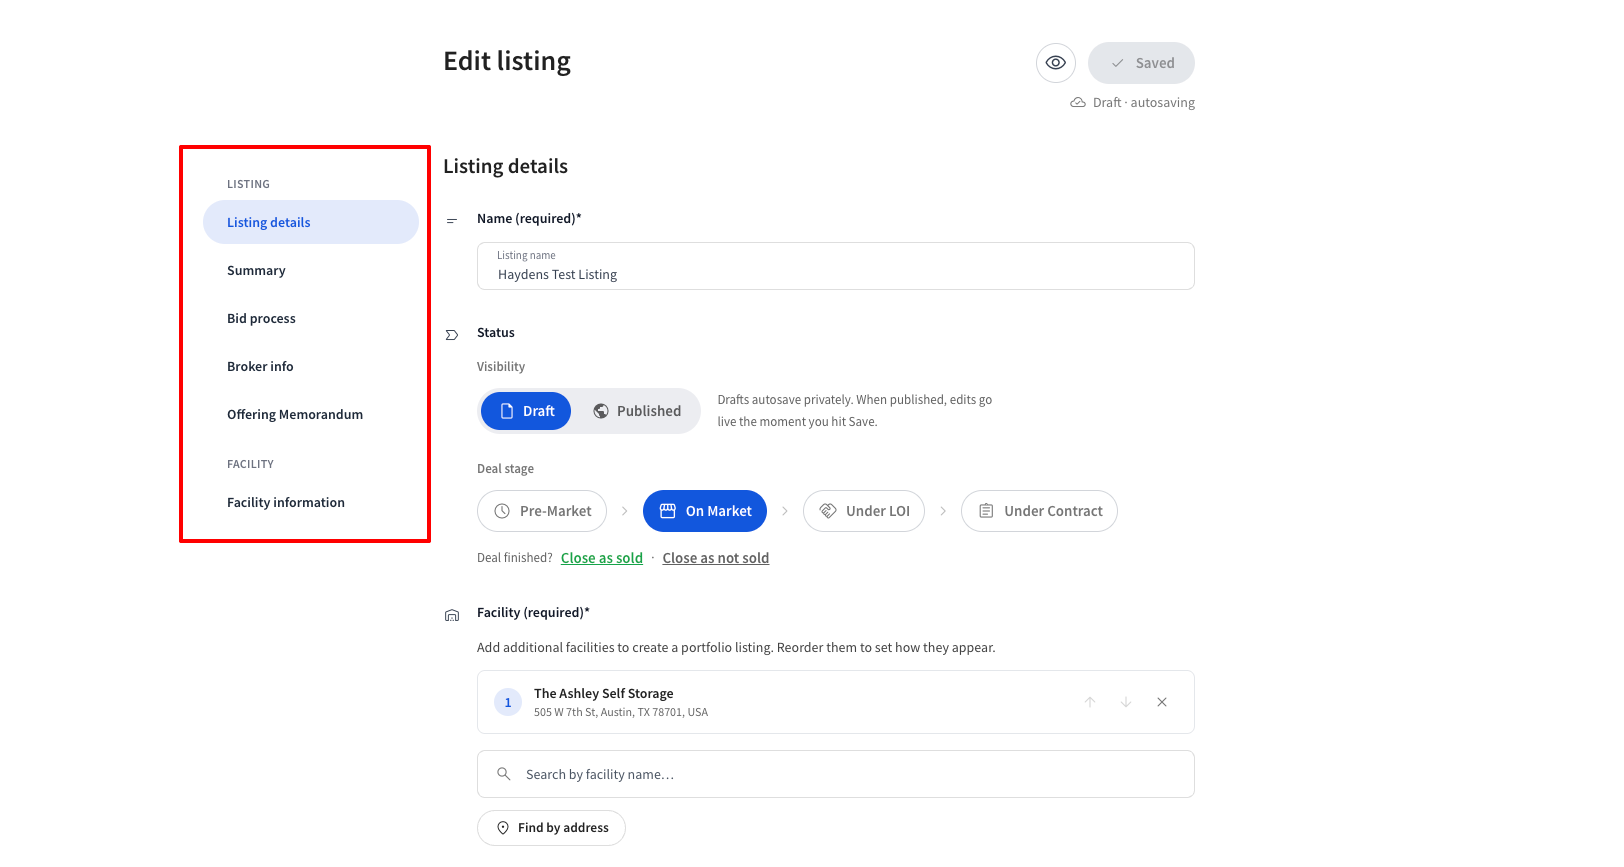
The edit page is where you can fill in all the specific details of the deal.
-
Status.
-
Set the listing as a draft or publish it when you are ready. You will also set a deal stage: pre-market, on-market, under LOI, and so on. When the deal is done, you can mark it sold or archive it.
-
-
Facility.
-
Working a portfolio? Add more than one site here. Keep adding facilities by name and address the same way you did when you created the listing.
-
-
Description and investment highlights.
-
Two free-form fields. Use the description for a general overview of the property, and use investment highlights for your key selling points, return thesis, debt assumptions, and anything else worth surfacing.
-
-
Summary.
-
Confirm the figures buyers look for first: net rentable square footage, occupancy, NOI, and other key numbers. The square footage, NOI, and occupancy (square-footage weighted physical occupancy) data will be automatically calculated at the deal level based on information you enter for the facilities in the deal.
-
-
Bid process and broker information.
-
Lay out the bid process and add your broker details. There is also a box for additional broker information if you want to include a bio, licensure numbers, or your broker record.
-
-
OM and cross-listing URL.
-
Upload your offering memorandum, and if the site is listed somewhere else (your own website, another platform), drop that URL in to redirect interested buyers there. If you require that investors sign a CA before accessing some deal files, you can link to wherever they can access that CA and those files here as well.
-
-
Other facility information.
-
Confirm your square footage totals and round out the operational picture: boat and RV square footage, parking spaces, building details (number of stories, year built, land acreage), climate and non-climate unit counts, and other key metrics.
-
-
Trade area.
-
Set the default trade area so that when someone views your site, TractIQ pulls data for the radius you choose (for example, three miles). You can also set a drive time instead.
-
-
Images and documents.
-
Upload property photos and any supporting documents you want to share, like a rent roll, occupancy stats, or P&L statements. An image is required for each facility on the listing.
-
After You Publish
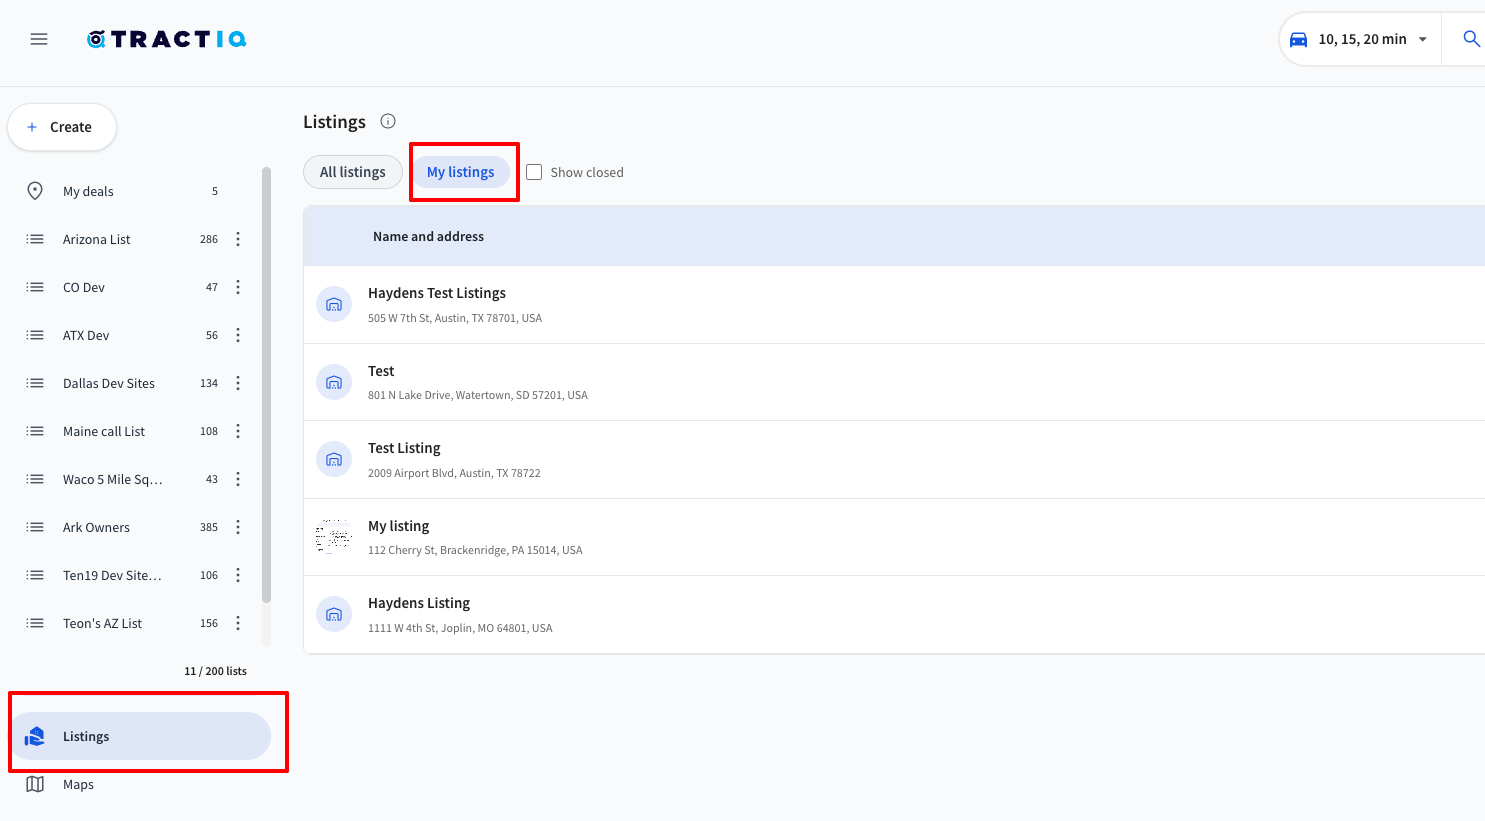
Everything you have created lives under My Listings. From there you can see each listing's name, the stage it is in, the asking price you set, the broker info, and the last date you or someone on your team updated it.
That is the full flow. If you ever need a hand editing or adding a listing at any phase, just reach out. We are always a phone call or an email away.